Guide
Destiny 2 Exotic Fusion Rifle Bastion Quest Guide
As of this week’s reset, it’s now possible to earn Bastion, which is the latest Exotic that has been added to Destiny 2 with Season of Dawn. We’ve put together a guide to help you earn it, but bear in mind that this is probably the hardest to earn Exotic for the season to date, just because of the sheer amount of time required to get it.
As of this week’s reset, it’s now possible to earn Bastion, which is the latest Exotic that has been added to Destiny 2 with Season of Dawn. We’ve put together a guide to help you earn it, but bear in mind that this is probably the hardest to earn Exotic for the season to date, just because of the sheer amount of time required to get it.
Step 1 – Corridors of Time

Before you can even think about going after Bastion, you need to complete the Corridors of Time quest. Well we thing you should, but you can also pick up the quest for Bastion from Saint-14 right now. If you haven’t done this, use our Corridors of Time quest guide. You can also use our Pigeon and Phoenix lore book guide or the Corridors of Time Emblem guide to ensure you grab everything from this crazy quest.
Step 2 – A False Refraction
For this quest step you need to go to The Tangled Shore and kill five Fallen Servitors and Captains. This will earn you Fallen Intel, which you should be able to get quite quickly if you head to Thieves’ Landing. After this is done, you need to head back to Spider for the next step.
Step 3 – Backroom Brawl
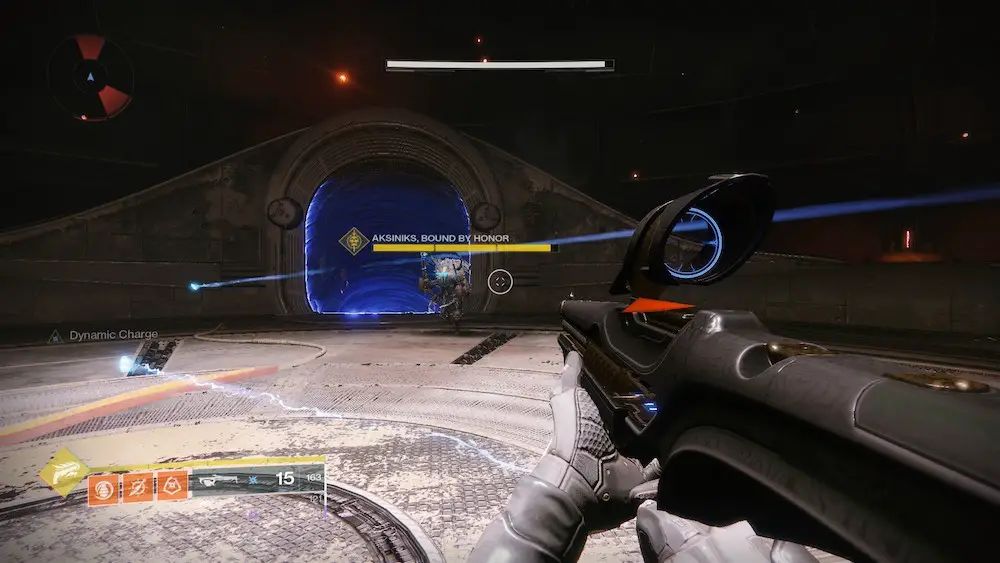
For this quest step you’ll be sent off to kill a Fallen Captain named Aksiniks by Spider. This guy is lurking in the Lost Sector The Empty Tank, back in Thieves’ Landing once again. There’s nothing crazy about this step, just complete the Lost Sector as usual, and you’ll find Aksiniks in the arena where the boss usually bounds about. Kill him, and go back to Spider.
Step 4 – A Strong Arm
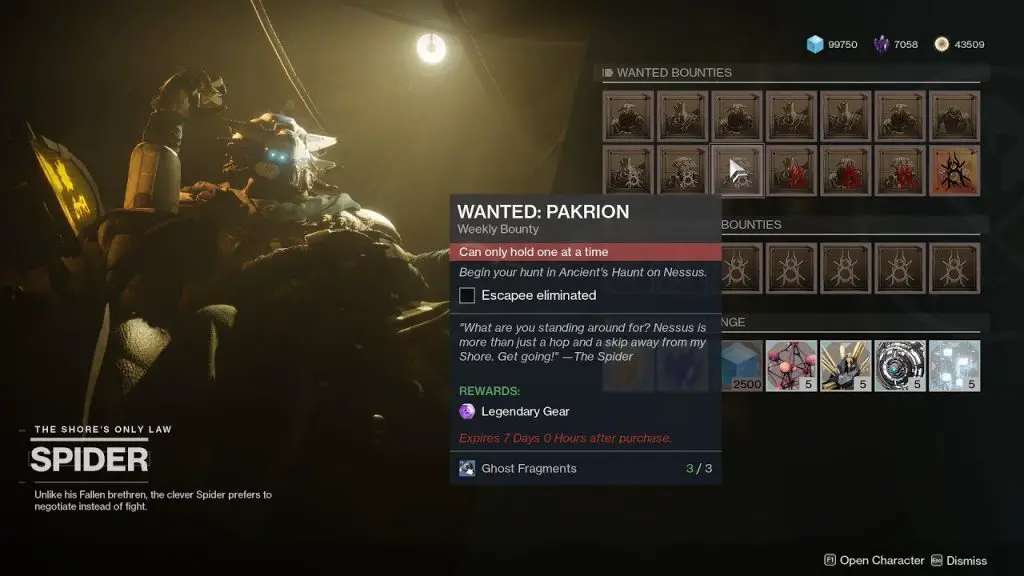
This is where the grind begins. First you need to clear 10 Spider Bounties, easier said than done, but on top of that you also need to kill 30 challenging enemies and complete 8 Public Events in The Tangled Shore. You can pick up Daily Bounties from Spider as well as his Wanted Bounties, they both work. Luckily the Bounties will count even if they’re for another planet, so go for the ones you reckon you can do fastest.
Step 5 – Rude Awakening
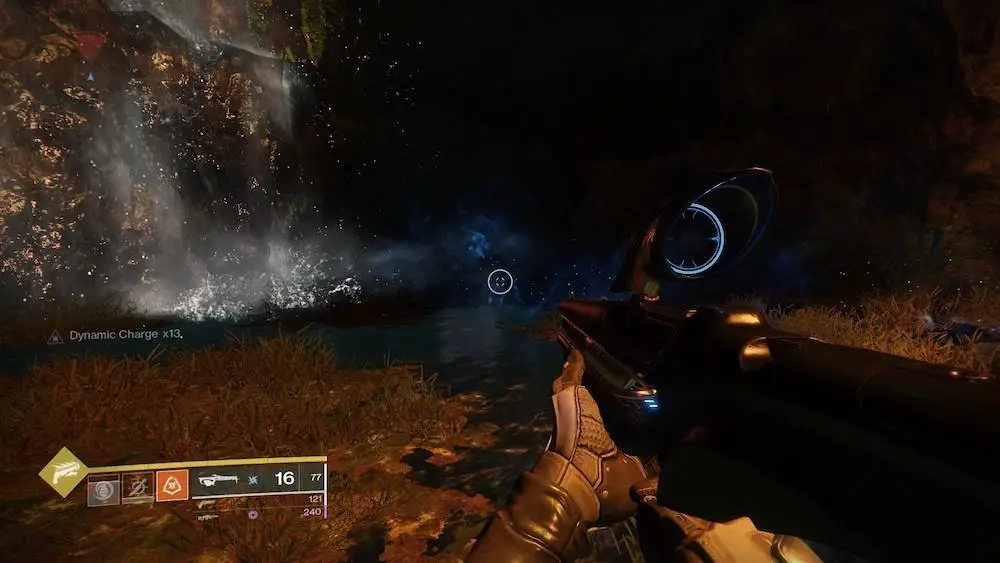
With the grind over, Spider will have conveniently located the information we need. This step sees you looking for a gravesite in the Lost Sector Trapper’s Cave. This is in the Four-Horn Gulch area of The Tangled Shore.
It’s not too difficult, hit the Lost Sector and run through it until you hit the waterfall, it should be occupied by Cabal Legionaries and Psions. Kill everything in the room, then drop down to the bottom of that waterfall. Finally, turn left and face the wall. There will be a blue Ether trail emitting from the gravesite. Interact with the gravesite to get the next quest step, but get ready because it’ll trigger a Scorn Ambush.
Step 6 – Altered Chief
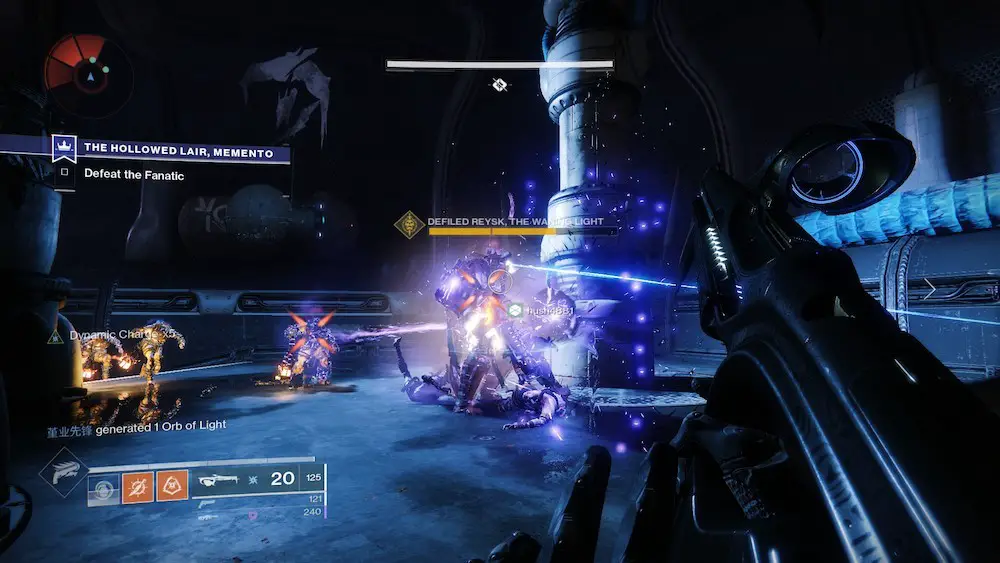
Now that we’ve got the Altered Chief item, it’s time to find that Scorn and kill it. Check the map and there will be a new version of the Strike The Hallowed Lair named The Hallowed Lair, Memento. This is where you’re going next. This version of the Strike is exactly the same as the original, but in the final fight there will be a Scorn Chieftain called Defiled Reysk, The Waning Light. Kill this thing and end the Strike by completing it, and then you can return to Saint-14 to claim Bastion as your prize.
We’ll have a review of Bastion up soon for you to get your head around it with. For now, let us know if you found the guide to get it useful in the comments.
Image Source: GosuNoob, GameSpot, YouTube, GameSpot, Polygon