Guide
Destiny 2 Reckoning Guide
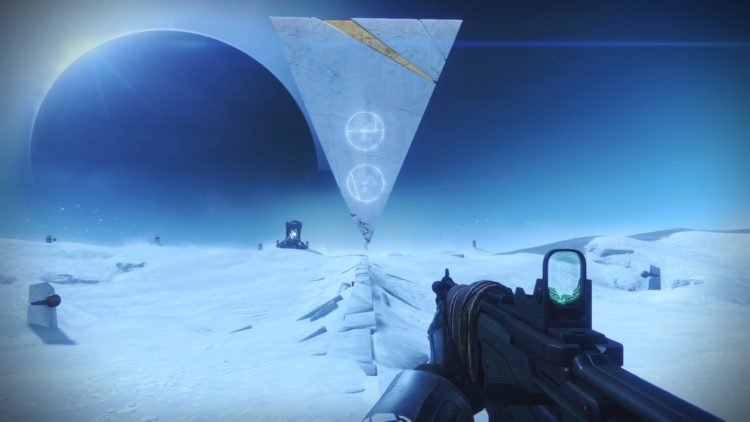
The Reckoning is the second main activity that makes up the endgame content for Season of the Drifter alongside Gambit Prime. It’s a tough activity though, made up of three different Tiers. We wanted to put a guide together so that you know what you’re doing when it comes to each one, so here it is.

The Reckoning is the second main activity that makes up the endgame content for Season of the Drifter alongside Gambit Prime. It’s a tough activity though, made up of three different Tiers. We wanted to put a guide together so that you know what you’re doing when it comes to each one, so here it is.
Starting Basics
Once you’ve picked up your Synthesizer you’ll be able to access Reckoning Tier 1. You need to inspect the item in your Inventory and add Motes to it, these correspond to one of each of the new Armour Sets from the activity.
By adding a Mote to the Synthesizer you can Wager it in the Bank, which is literally a Bank from a Gambit match at the edge of the large hole at the start of Reckoning. Each of the four sides of the Bank correlate to one of the Armour Set types, so if you find you can’t Wager at one, try the others. As long as you Wager before jumping into Reckoning then you’ll get a reward, collectable from the Bank at the end of the event.
If you don’t go in as a team to Reckoning it can be brutally hard. Communication is key, but as long as you stick with the other Guardians and focus on fending off the enemies while protecting each other you’ll be okay. If you do jump into a match with other random Guardians, play nice and stick at it. I will say that from experience it’s pretty difficult to jump in and win without a team under the recommended Power Level, which is 650 for Tier 1.
Reckoning Tier 1 Guide
In Tier 1 of Reckoning you’ll jump into the arena with a 6 minute timer. In this time you need to reach 100 percent dominance over the Taken, which means killing loads of them quickly. If you slack the dominance percentage will fall. Once you’ve reached 100 percent a Taken Boss is summoned.
The Taken Boss can either be a Centurion, Wizard, Knight, Hydra, or Meatball (the Ascendant Primeval). There’s a time limit to kill the boss in too which is around 3 minutes. The boss is extremely tough to take down, so you’ll need to hit it with everything you have.
So far it looks as though there are a couple of potential modifiers for Tier 1. Prism increases elemental damage, and rotates between Solar, Void, and Arc. Blackout removes your radar and makes enemy melee attacks deal more damage, which is big considering how close they all get.
This completes Tier 1, and opens up Tier 2 for you to enter if that’s what you’re grinding towards.
Reckoning Tier 2 Guide
With Tier 2 you can Wager two snyths, creating a blue Mote for you to wager in the Bank. This will still drop you in the Tier 1 zone, but you’ll get new instructions. You must go through a new mysterious doorway and down a long corridor, and beyond this is The Bridge. This area is also known as Thrallway 2.0, and for a good reason. The Thralls that spawn here aren’t only abundant, they’re Power Level 670, so be prepared to grind up those levels before you take this Tier on.
The Bridge
To complete The Bridge your Fireteam must activate six circular zones on the floor. Thralls and other enemies will spawn to take you down and prevent you from doing this, but as long as you work together and support each other with your Supers you’ll get through this stage.
Hermit and Knights
In this next zone you’ll be in a creepy area with water to the sides that drains your energy, avoid it. There will also be two Sword Knights who will chase the Fireteam around, and a glowing Ultra enemy known as a Hermit. Killing the Hermit will make it drop a Well of Light, which you and your Fireteam need to stand in to attack the Knights.
A note of caution here, the Knights will go berserk when below 25 percent health. If you focus on killing the Knights one at a time you will fare better against these enemies than you will if you split your damage between them.
It’s also worth knowing that if more than one of you die while in this fight you should wait for the other Guardian to die and join you. It’s harder to fight through the enemies on the way to the Knights with less than that.
Tier 3 will become active once you’ve killed both Knights, and you’ll be able to collect your Tier 2 Gambit Prime gear as well.
Reckoning Tier 3 Guide
Mobs for Tier 3 are 690 Power Level, and you need to be at least 680 to take the event on. You also need to acquire a Powerful Synthesizer from The Drifter, and a purple Synth, made up of three Gambit Prime archetype Motes.
You still need to complete Tier 1 and Tier 2 before accessing Tier 3. There’s a stiff time limit on Tier 2 that requires you to build the Bridge very quickly, with each section adding 30 seconds to the timer, but needing 20 seconds to build.
Instead of the two Knights and Hermit being your enemy in the second phase of Tier 2, you need to take down the Shade of Oryx from The Taken King. The boss is pretty easy to handle though, because it doesn’t even have a sword.
Once you’ve done this you have completed the Tier. This will award you with some Tier 3 Gambit Armour, which is pretty powerful when it comes to playing Gambit Prime.
We hope this helps you get through the toughest challenge currently available in Destiny 2. Let us know what you think of Reckoning in the comments.
Image Source: PC Invasion


