Guide
The Draw Exotic Quest Guide

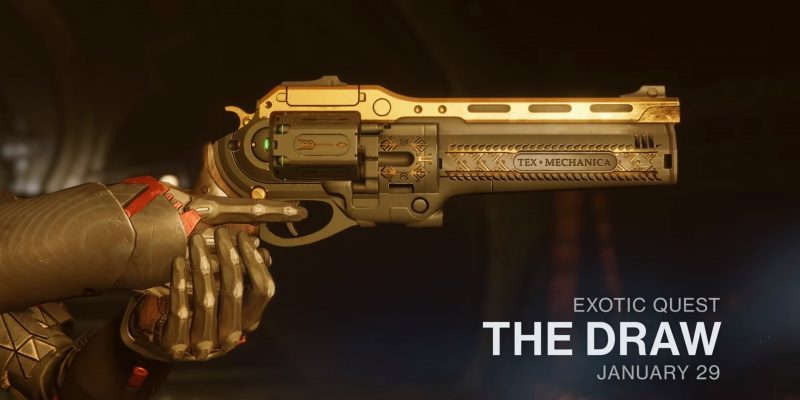
Destiny 2 update 2.1.4 is live, or still going live at the time of writing anyway. That means that the Exotic quest, The Draw, is also live, which also means that we can finally get our hands on the Destiny 2 version of The Last Word.
This time around the Exotic quest isn’t going to take a number of weeks to be rolled out. You can boot up Destiny 2 and chase down The Last Word today if you’d like to! We’ve got all the quest steps right here, so stick the game on and get ready to arm yourself with something special.
Step 1 – Tainted Artifact
The flavour text on this step is: “Seek the guidance of one who dabbles in the arcane to learn more.”
The lore for this step is: “This unknown artifact seethes with an odd, familiar sickness.”
The first step in the quest is to go and talk to The Drifter, referred to as one who dabbles in the Arkane. He will give you a Hive artifact that needs some cleansing, and the only way to do that of course is to kill Hive.
Step 2 – The Cleansing
The flavour text for this step is: “Purge the artifact of its sickness.”
The lore for this step is: “Some who walk a darker path believe what we call ‘Weapons of Sorrow’ ain’t a complete science. This artifact could be key to a new understanding- if you’re willing to risk temptation.” – The Drifter
This is the actual killing Hive part of the quest. You need to collect items that Hive drop after you’ve killed them, you’ll need to kill Hive with Solar damage, and you’ll need to kill three Hive bosses.
The best way to complete this quest step is to head to Mars and jump into an Escalation Protocol. Make sure you have some Solar weapons equipped and a Solar subclass, and you’ll finish this in around 20 minutes.
Step 3 – A Cleansed Artifact
The flavour text for this step is: “The artifact is now cleansed. But what is its purpose?”
The lore for this step is: “The artifact is free of disease now. I might be able to see what it’s for. Bring it to me. Let’s see how far down this dead-end leads.” – The Drifter
This step is very much a check-in step. Head back to The Drifter and chat to him to unlock the next step.
Step 4 – The Temptation
The flavour text for this step is: “Want to see what this artifact can do? Feed it Light by defeating Guardians in the Crucible. Being defeated will impede progress.”
The lore for this step is: “The 7th Book of Sorrow speaks of a great Unmaking. Old friends of mine believe it’s the blueprint for terrible weapons made in its name. I think they’re mostly right, but to find out some of your friends are gonna have to suffer.” – The Drifter
This step is Crucible focussed, and requires you to get more kills than deaths. Kills and assists will grant you one percent progress, and deaths will subtract one percent. It looks like there’s some sort of system that increases the percentage gain with streaks, so try to be really good.
Step 5 – The Damnation
The flavour text for this step is: “The artifact is calling to something dark. Uncover a dark ritual on Titan and stop the twisted ceremony.”
The lore for this step is: “The artifact is in pain. Can you hear it? It’s made to feed on Light, and that Light is feeding something other. The trail is faint, but the screams don’t lie. Get to Titan. Answers wait where dead things play.” – The Drifter
This step gives you a mission which takes you over to Titan to take down a particularly stubborn Hive Acolyte. Once the mission is finished you head back to The Drifter to chat to him once again.
Step 6 – A New Jagged Purpose
The flavour text for this step is: “You found a Guardian’s helmet penetrated by a unique bullet.”
The lore for this step is: “The artifact was part of a Hive ritual tied to their efforts to perfect the Weapons of Sorrow. But that helm you found? Only one thing can cut through a Guardian like that. We may be too late. New weapons may already be in play.” – The Drifter
For this step you take the Helmet pierced by a mysterious bullet back to The Drifter, and then he’ll give you a much longer mission.
Step 7 – Sullied Light
The flavour text for this step is: “The Hive weapon master is creating new Weapons of Sorrow. You need to stop it. Gather powerful objects to sully your Light and complete the ritual.
- Collect Etched Crystals from Lost Sector wanted escapees.
- Earn multiple “Best served cold” and “Blood for blood” medals in the Crucible.
- Defeat Hive with precision damage to collect larvae.
- Sacrifice Hive bosses summoned in witches’ rituals.”
The lore for this step is: “This is it, Guardian- the furthest you’ve gone down sorrow’s road. There ain’t no turnin’ back. If the Hive are upgrading their arsenal, we need to know where and how, so we can stop it and learn from it. Don’t worry. This ritual won’t make you a bad guy. It’ll just feel like it.” – The Drifter
This step requires a lot of Crucible work, but don’t worry because you can achieve it if you stick at it. You need to earn certain medals multiple times; Blood for Blood, and Best Served Cold. Blood for Blood is easily earned because you just kill the Guardian who killed you last. Best Served Cold is earned by killing the Guardian who killed you last.
A hot tip for this is to just jump into Crucible matches with teams, nothing where you’re on your own.
The quest also has some PVE elements. For these you must kill bosses in Lost Sectors, and kill Hive with headshots.
Finally you also need to complete the Summoning Ritual Public Event.
Step 8 – Sorrow’s Road
The flavour text for this step is: “You have all you need to track the Hive weapon master.”
The lore for this step is: “Using the thorn from your dead friend’s helm and lettin’ corruption touch your Light ain’t an easy call. But you didn’t back down. Come see me and we’ll track the weapon that fired that jagged bit of death.” – The Drifter
This is another step that goes back to The Drifter, who will send you after the real big bad.
Step 9 – The Conversation
The flavour text for this step is: “Enkaar, the Hive weapon master, is hiding in Hellrise Canyon in the Tangled Shore. Hunt him down!”
The lore for this step is: “Time to hunt us a Hive weapons master and put an end to whatever he’s cookin’ up. This is where you get to be a hero, and we both get to learn a little bit more about things best left undiscovered. Careful out there, you’ll be alone, and the odds’ll be stacked. Hope you make it back.” -The Drifter
The mission begins on The Tangled Shore, but stand back once it stars because you’ll be recovering health from Light Wells due to the Suppressed Light perk.
Next up you need to defeat a wave of enemies until a large Ogre appears for you to slay. When you kill it you need to take the Worm and quickly open the blocked door. In the next room you need to kill three Wizards, and then destroy a massive crystal.
Next you need to jump down the hole and stand on the plate. Once the plate is charged you’ll get a prompt to ‘Draw’ and that’s when you need to draw The Last Word, and wait for Enkaar to lift its weapon. Use the weapon to shoot that weapon out of its hand, which will cause it to teleport away and open your way forward.
This room also has a plate, but you need to kill all the enemies before you can use it. As you prepare to draw two copies of Enkaar will appear, so make sure you take note of what order they appear in. Shoot the gun out of both of their hands as they ready up, they’ll prepare to shoot in the order that they appeared.
The third plate is the same as the previous one, bit three Enkaar will appear. Once you shoot them in the order that they’ve appeared, you’ll be able to claim The Last Word.
Step 10 – A Darker Path
The flavour text for this step is: “You defeated the Hive weapon master thanks to a mysterious gift, the Last Word. What would the Drifter say about that?”
The lore for this step is: “The hunt is over. Our weapon master is defeated, thanks to you. And in his wake, you’ve found the Last Word? Well I’ll be. Hm. It’s probably best we close this case down. For now.” – The Drifter
This final step is another visit to The Drifter, who will give you a little more lore on The Last Word just to tie things up.
We hope you manage to pick the weapon up! Let us know how you get on in the comments.
Image Source: Kyber’s Corner


