Guide
Destiny 2: Deep Stone Crypt Raid Guide – Taniks, the Abomination
The fourth part of our Deep Stone Crypt guide.
The raid’s final boss is a build upon the mechanics created in the last encounter, with a DPS phase and a much larger map. Just like last time, split your group into 3 teams of 2, one for each buff.
Map Layout
Spawn/White – This is the area just to the left of the player spawn
Tubes/Blue – This is just behind Spawn, all the way to the left
Back/Orange – This is to the right of the player spawn, all the way into the back.
Each of the areas has two terminals to dunk nuclear cores in, and a terminal to swap the augmentations.
Scanner
The Scanner will be able to see which nuclear terminal to dunk the cores in, just like last encounter. Call them out to the team so everyone knows where to go. The Scanner Vandal will spawn at the Tubes location
Callout examples:
Tubes Left, Orange Right
Spawn Right, Tubes Right
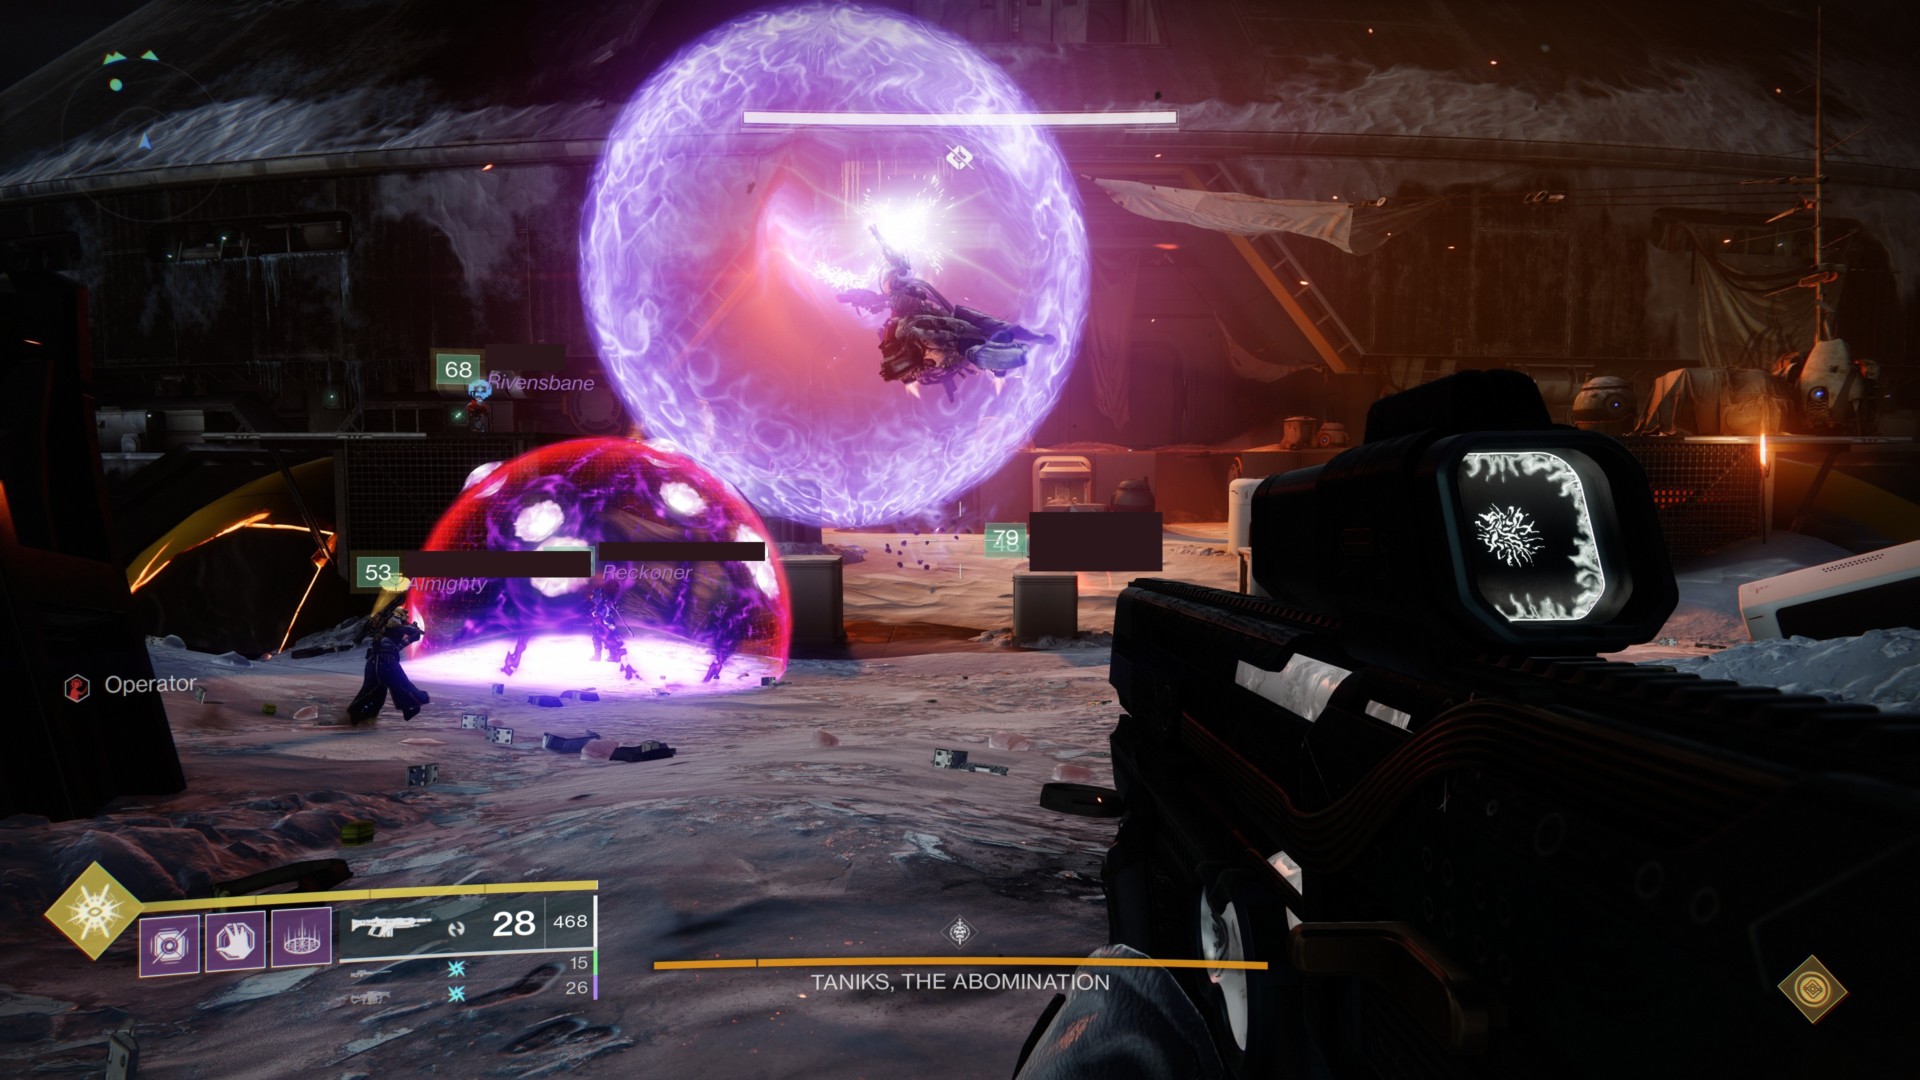
Operator
The job of the Operator is to release players trapped in a bubble while running a nuclear core. All they have to do is shoot one of the white circles on the bubble to release their teammate. The Operator Vandal will spawn at the Spawn location
Suppressor
The Suppressor Vandal will spawn at the Orange location, near the back of the map. Once Taniks starts to do his channeling spell, look for the 3 security drones, and just like last encounter, shoot Taniks under each one. This will disrupt him and allow the nuclear cores to be deposited.
Nuclear Cores and Augment Deactivation
Speaking of the nuclear cores, we spawn these during Taniks’ channeling phase. Focus on only two out of the four thrusters on his lower body, and shoot those until a core comes out. Run them to the various terminals and slam them in.
Just like the last encounter, after each phase of the nuclear cores, one of the augmentations will randomly be deactivated, and will have to be swapped with that guardian’s teammate.
Once you deposit 4 nuclear cores, the DPS phase will start.
DPS Phase
Taniks will first surround himself in two rings:
- The outer ring has debris circling very fast around it. If you try to walk in, one of the pieces of debris will hit and kill you instantly.
- The inner ring has an energy field that will constantly damage you until you’re dead.
You will need to stand in between the outer and inner ring for DPS. If you have a player with Divinity, Taniks’ crit spot will be created underneath him, making for easy aiming.
After a few seconds, Taniks will stomp, sending everyone out of the ring. Go back inside for more DPS. The second time he does this, the phase is over. Rinse and repeat until you get to final stand!
Final Stand
This part can get very hectic, as Taniks will teleport all over the map, and your team needs to burst him down as fast as possible before he wipes the encounter. If you manage to take out the last bit of health, congratulations! You’ve managed to defeat the newest raid in Destiny 2: Beyond Light.
If you found this guide helpful, or have constructive criticism to add, make sure to let us know down in the comments below!
Image Source: PCInvasion
1 Comment
Leave a Reply
Leave a Reply


Tex
December 5, 2020 at 3:12 am
This is the hard way to do it. Just drop Scanner, shoot all four cores, Suppressor and Op won’t pickup, and four dunks will be at the two sides Shaniks isn’t at. This way you get a longer damage phase, use one Div, two Wellocks that drop inside and a bubble or two on the outside where you get booped back to. You’ll get three long damage phases doin this, and five Heratiges (with Recombination for extra damage) or other slug shottys with an Anarchy for tick can one phase him to Last Stand (not ‘final’) easy.