Guide
Destiny 2 Beyond Light Aspect Of Control Guide
A little guide to completing Aspect of Control in Destiny 2 Beyond Light.
Once you’ve done a good chunk of what’s on offer in Destiny 2 Beyond Light, and I mean a good chunk, you’ll come up against Aspect of Control. This quest is driving a lot of Guardians bonkers at the moment because of the Entropic Shards section. In this guide I’m going to walk you through the quest, and hopefully provide a helpful tip or two about getting through it with your sanity intact.
First and foremost, I need to point out that you have to complete Stasis Prototype before doing this quest. You need the reward from that quest, which is Salvation’s Grip, or you won’t get anywhere in Aspect of Control
Step 1 – Entropic Shards
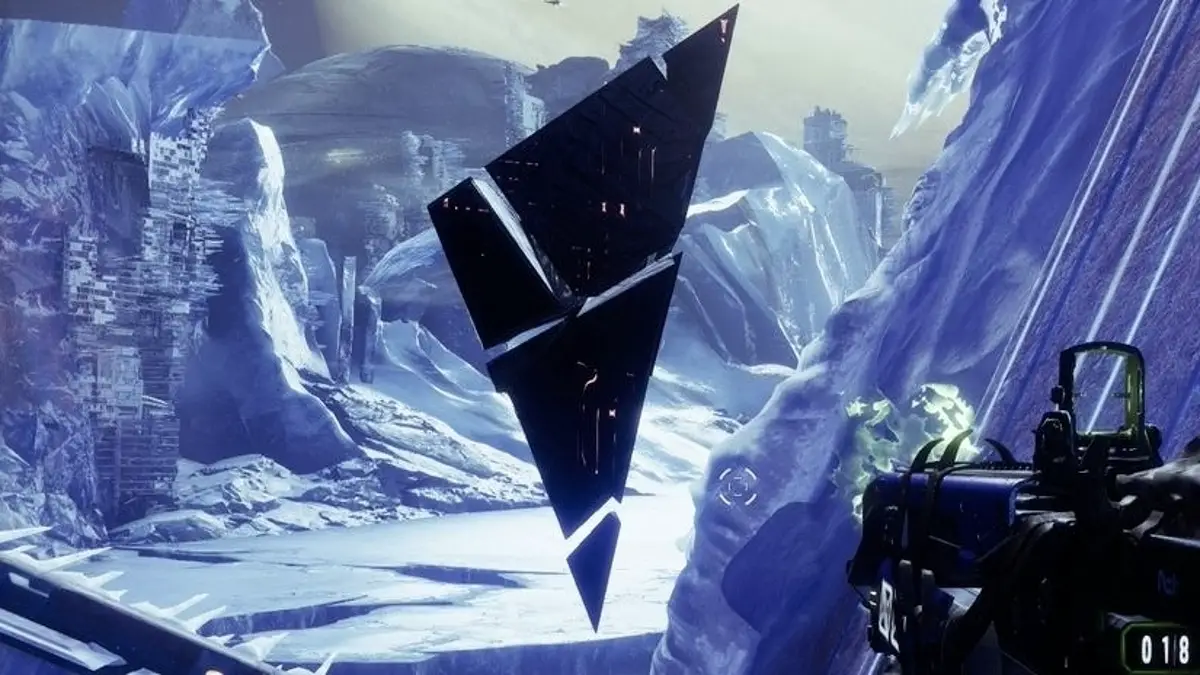
This is where a lot of Guardians fall off the bandwagon with this quest. To complete this step, you need to find 5 Entropic Shards on Europa. They’re small Pyramids that you need to shoot and destroy with Salvation’s Grip.
So far I’ve seen that there are nine of these things you could go and collect. As it stands though, you’ll just need to go to the five easiest ones.
Entropic Shard 1 – Cadmus Ridge
Head to Cadmus Ridge on Europa. You’ll go through the area on your way to Bray Exoscience. The Entropic Shard should appear right before you enter the Bray wreckage.
Entropic Shard 2 – Concealed Void Lost Sector
This Entropic Shard is inside a Lost Sector, and is unmissable. Head to the location of this Lost Sector, kill the boss, and look at the top of the room. It’s up there for you to shoot down.
Entropic Shard 3 – Asterion Abyss
Head to Asterion Abyss. Just as you enter the area, there are some pillars in the middle of the area up ahead. Climb up these and you’ll find an Entropic Shard at the top.
Entropic Shard 4 – Riis Reborn Approach
Now go to Riis Reborn Approach. This area is trickier to navigate. You first need to head left where the Pyramid is, and then go right. At this point you’ll see a passageway. This is locked, but you can unlock it in this area, so get that done and go through. Once you go up the elevator on the other side, there are some stairs. The Shard is behind these.
Entropic Shard 5 – Technocrats
This final Entropic Shard is right at the top of the map, so get trekking. You’ll be heading here as part of the campaign, so you may well recognise it. Head to the boss room, and then look for the Entropic Shard floating at the top of the room on the right-hand side.
Step 2 – Return the Crux of Darkness
This is the step that requires a guide. You need to return the Crux of Darkness to Riis Reborn Approach. Check you map for the specific location, and commune with the Pyramid once there. Now it’s a game of killing Fallen until you’re deemed worthy.
With that step complete, you’ll be give the first Aspect of your armour powers. You can test this out and go crazy against some enemies with a full-on ice shield all over your body now.
Let us know if you complete this quest in the comments.
Image Source: Eurogamer